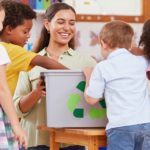
Halloween is the perfect time to spark an interest in science with spooky and creepy experiments. Whether it’s observing how pumpkins rot or using chemical reactions to create real-life ghosts, implementing hands-on activities in your classroom will not only capture your students’ attention but also yield long-term benefits such as higher standardized test scores and project management and communication skills.
Here are three Halloween-themed experiments you can use to engage your students all October long. For these experiments, most of the supplies you need are inexpensive and available at your local grocery store.
Pumpkin Investigation
The pumpkin investigation is a month-long project that allows students to implement scientific theory and practice close observation. By observing the decay of a pumpkin over time, students learn the factors that affect the process (temperature, weather, pests, etc.) and how altering variables changes the results. Plus, kids love playing with pumpkin “guts”!
Suggested Ages
Elementary or Middle School
Supplies
- 4 pumpkins
- Pumpkin carving supplies
- Tape measure
- Notebook and pencil
- Marker
- 4 disposable pans, such as aluminum pie or casserole containers, large enough for the pumpkins
Directions
Select Pumpkins
Make sure your pumpkins are large enough to be carved but small enough to rot within the timeline of your experiment. Try to keep the pumpkins close in size except one that is either noticeably larger or smaller.
Record Initial Observations
Divide your class into four groups, and assign each group to a specific pumpkin. If you aren’t planning to carve the pumpkins, make sure to number the disposable pans. Provide each student with a handout with the following prompts.
- Draw your group’s pumpkin.
- How tall is the pumpkin? How many inches around?
- During the experiment, what do you think will happen to the pumpkin left outside?
- During the experiment, what do you think will happen to the pumpkin left in the sun?
- Do you think the larger (or smaller) pumpkin will rot at the same speed as the other pumpkins?
Tip: Be sure to carve faces into your pumpkins! Have students vote on fun face designs.
Place the Pumpkins in Various Locations
Put each pumpkin on its own disposable pan. Place one in a sunny place by the window, one in a safe place outside and the final two (the off-size pumpkin and a control pumpkin) in a neutral spot in the classroom.
Follow Up
Once a week, have students make close observations of how the pumpkins are rotting. Students will keep a record of the process in a journal and answer the same six questions each week (listed below). Over time, they will see which factors sped up the decomposition process and which slowed it down, and they’ll be able to compare the results to their initial hypotheses.
- Draw your group’s pumpkin.
- How tall is the pumpkin? How many inches around?
- How has your group’s pumpkin changed?
- In the coming week, what do you think will happen to the pumpkin left outside?
- In the coming week, what do you think will happen to the pumpkin left in the sun?
- In the coming week, what do you think will happen to the larger (or smaller) pumpkin?
Germs! Gross!
Provided by Schooling a Monkey
This experiment investigates germs and disinfecting. Students study the growth of germs to determine which handwashing method is most effective. It takes around two weeks to complete this project, so be sure to plan ahead. This project is perfect for Halloween – showing students they never know what creatures lurk on their hands!
Tip: Prepared petri dishes should be refrigerated until used and always stored upside down
Suggested Ages
Elementary, Middle, or High School
Supplies
- Petri dishes prepared with agar (6 for each group)
- Masking tape or labels
- Marker
- Hand soap
- Hand sanitizer
- “Germs!: An Epic Tale on a Tiny Scale!” by Martin Howard and Colin Stimpson or a video explainer like this one from Cincinnati Children’s Hospital
Directions
Read the book Germs!, or for older students, watch an informational video with the class. These materials provide a basis for the lesson and explain what germs are and where they live.
Divide the students into groups (no more than six per group) and give each group six petri dishes. Direct students to touch multiple surfaces in the classroom – the desks, the floor, any carpeting or stuffed animals, books, doorknobs, etc. Then have the students wash their hands in one of the following six ways:
- No washing and no sanitizer (control group)
- Cold water only for 60 seconds
- Hot water only for 60 seconds
- Cold water and soap for 60 seconds
- Hot water and soap for 60 seconds
- Hand sanitizer for 60 seconds (or until fully evaporated)
After the students have washed their hands, have them press a finger firmly into one of the petri dishes. Use masking tape to label the petri dishes with which handwashing technique was used.
Place the plates in a safe location out of direct sunlight or excessive heat. Have students predict which plates will be most germy and what they think the dishes will look like; will they be able to see the germs or not?
On the same day over the next two weeks, have students draw the progress of the germ growth. At the end of the experiment, the germs will be visible and will have taken over most of the plates. Students will be able to see the direct results of not washing their hands and how quickly germs can spread. Have them revisit their original predictions; were they correct?
Ghost Rockets
Provided by Growing a Jeweled Rose
For this experiment, students build pressurized ghost rockets using effervescent tablets. The buildup of gas causes the ghosts to take flight, demonstrating Newton’s Law of Motion. Because this experiment takes place outside, be sure to plan it for a nice day.
Suggested Ages
Elementary or Middle School
Supplies
- Clear film canisters with lids
- Corn starch
- Water
- Marker
- Effervescent tablets, such as Alka-Seltzer
- Stir stick
Directions
They wouldn’t be ghosts without spooky faces! Turn the film canisters upside down and draw faces, making sure to allow time for the marker to dry. Add a teaspoon of cornstarch to each canister and then fill one third of it with water. Stir well. This mixture is similar to liquid sidewalk chalk.
Take an effervescent tablet and break it into three or four pieces. Drop them quickly into the cannister, put the lid on and place the cannister lid-down on the sidewalk. Step back! The ghost will “fly” when the pressure of the carbon-monoxide bubbles builds up so much that the gas needs to escape. The insides of the ghost will whoosh out of the rocket, leaving a spooky trail. (Don’t worry – it’ll come off the pavement with water.)
Experiment with different combinations (more water, fewer tablets, etc.). Time how long it takes before the ghost flies and how long it’s in the air. Discuss the idea of “equal and opposite reactions.”